Setup
Confidential Data Protection has an integrated setup wizard to assist you with the initial configuration of the extension. It is recommended to use the setup wizard page to set up the extension.
-
Search for and open the Confidential Data Protection Setup Wizard page using the Tell Me search feature.

-
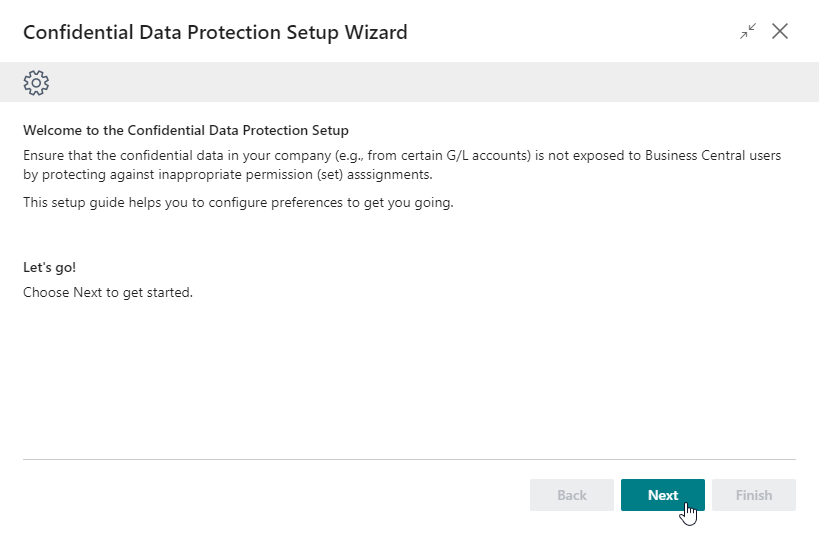
Read the introduction and click on Next to move on to the next step.
-
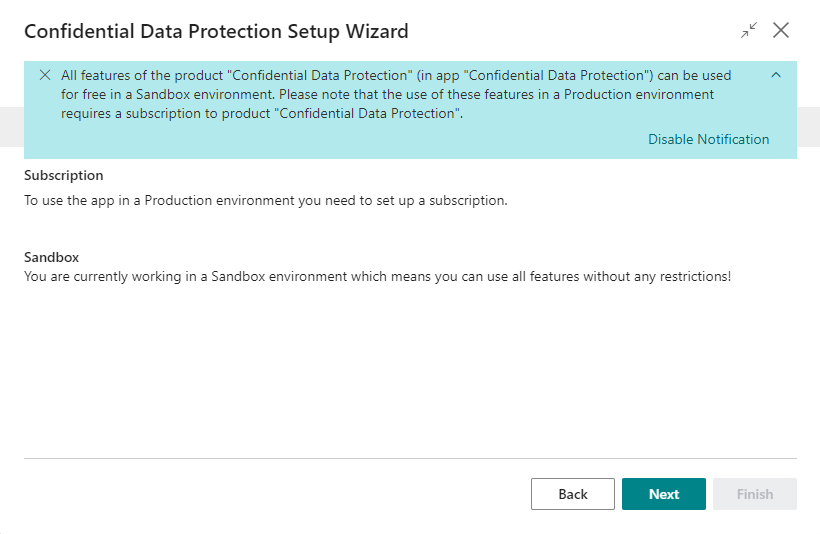
Read the information about the extension being free-to-use in Sandbox environments and requiring a subscription in Production environments and choose Next to move on to the next step.
-
SUPER Administrators
The Set up Super Administrators step of the setup wizard allows you to assign SUPER administrators for your Business Central environment.
A SUPER administrator is a user that is allowed to assign the SUPER, SUPER (DATA) and SECURITY permission set to users in your Business Central environment. Please find more information about these special permission sets in the Special permission sets section on Microsoft Learn.
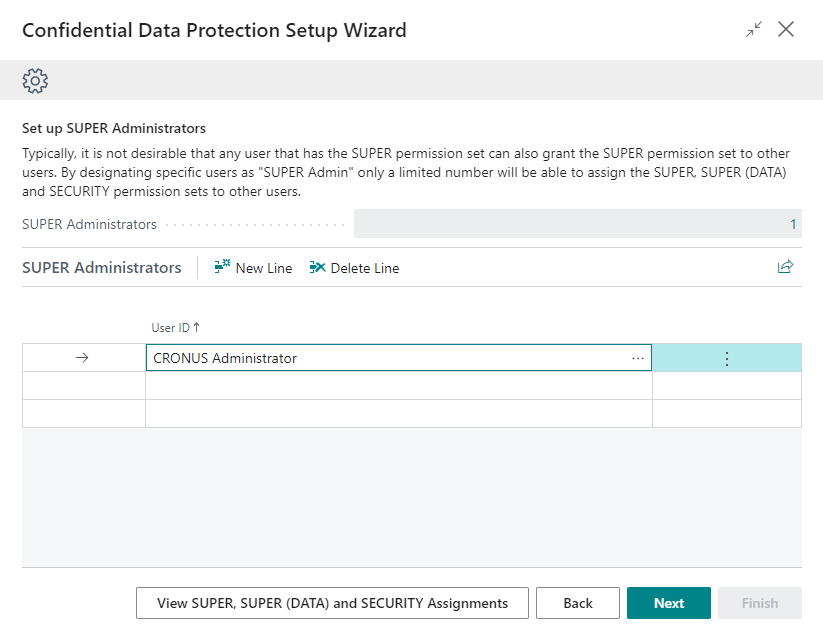
You can configure zero, one or multiple SUPER administrators. If no SUPER administrators have been configured, then any user that has the SUPER permission set assigned will be able to assign the permission sets to other users, like would normally be the case.
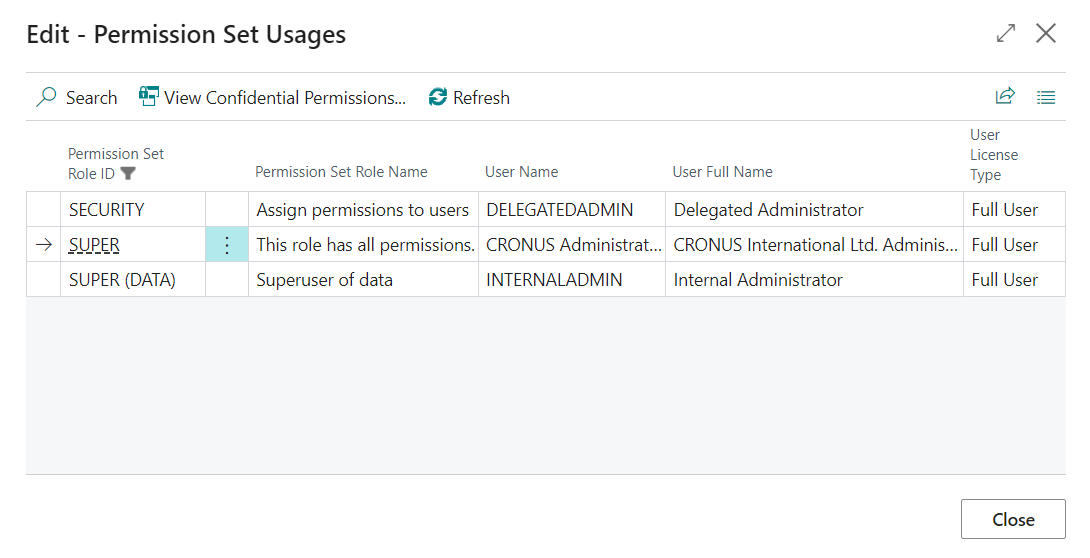
Note that you can use the View SUPER, SUPER (DATA) and SECURITY Assignments action in this step to view the users that currently have the SUPER, SUPER (DATA) and/or SECURITY permission sets assigned.
After configuring the SUPER administrators for your Business Central environment, choose Next to move on to the next step.
-
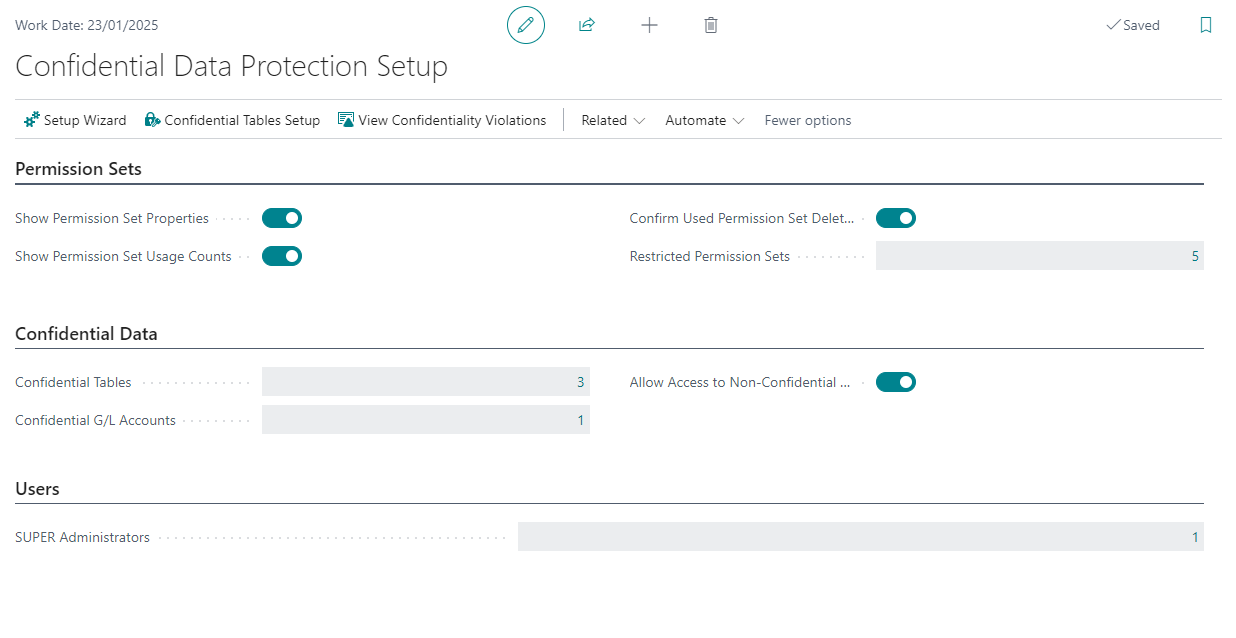
Confidential Tables Setup
In the Set up Confidential Tables step you can view which tables are considered to contain confidential data by the Confidential Data Protection extension.
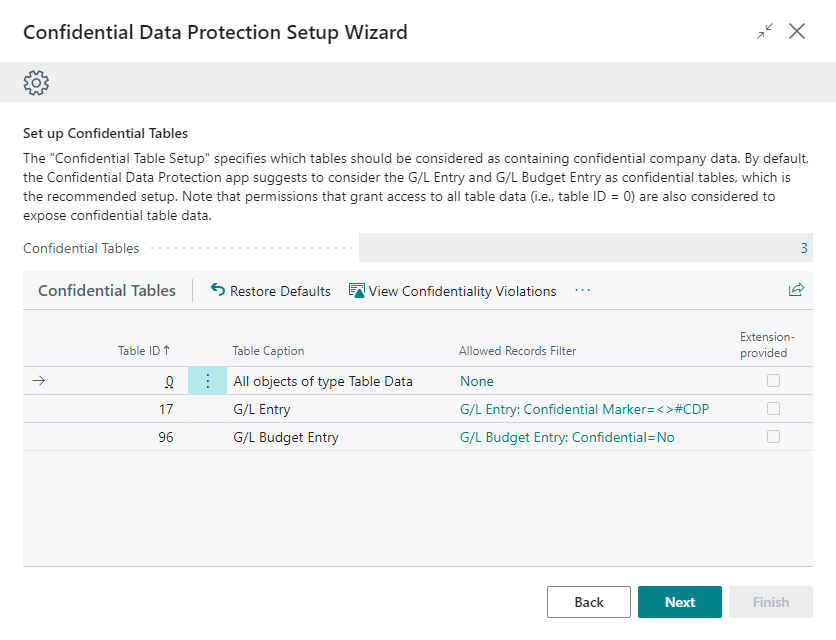
By default, the G/L Entry table and G/L Budget Entry tables are considered to contain confidential data (and they are part of the recommended default setup). This means that Table Data Direct Read permission assignments for these tables are considered confidentiality-violating permission assignments as they would grant users access to confidential data in Business Central.
For tables where only some records contain confidential data, the Allowed Records Filter field is used to specify which records are allowed to be accessed by users, i.e., which records in the table are non-confidential.
Note that permission assignments that grant access to all table data (i.e., a permission assignment for table ID = 0) are always considered to expose confidential table data.
For more detailed information, please see the Confidential Tables Setup section in the user manual.
Choose Next to move on to the next step.
-
Confidential G/L Accounts
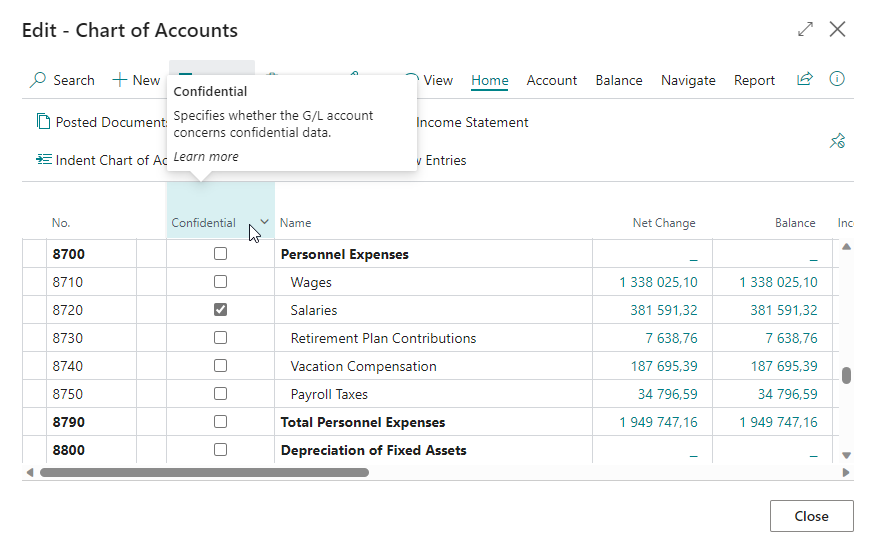
In the Set up Confidential G/L Accounts step you can configure your preferences for access to G/L account/entry data. With the Confidential Data Protection extension installed, you can mark specific G/L accounts as Confidential for those G/L accounts where the related G/L entries contain confidential data.
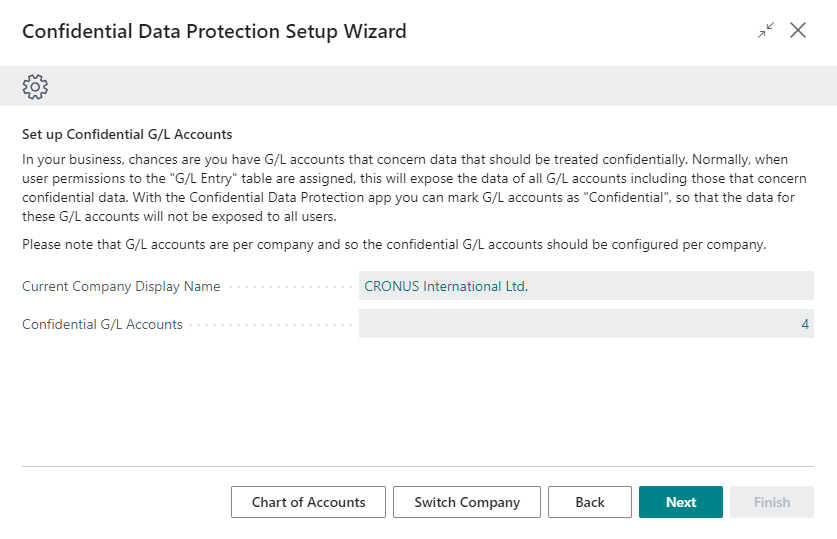
The Confidential G/L Accounts field will display the number of G/L accounts that have been marked as Confidential. By drilling down on the field, you can open the Chart of Accounts page and use the Confidential field to mark G/L accounts that contain confidential data.
For more detailed information, please see the Confidential G/L Accounts section in the user manual.
After configuring G/L accounts as confidential G/L accounts to preferences, choose Next to move on to the next step.
-
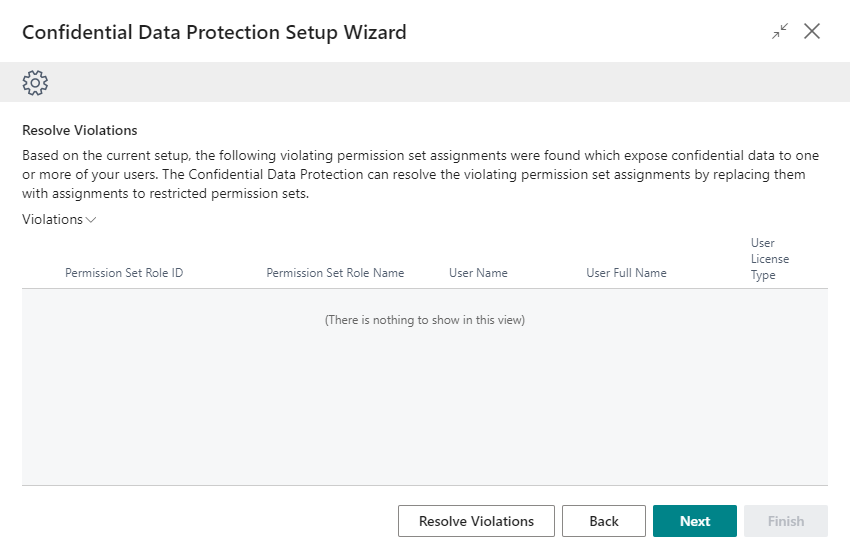
Identify and Resolve Violations
Based on your setup in the previous step, the Resolve Violations step will show you the identified confidentiality-violating permission (set) assignments, and help you to get these violations resolved.
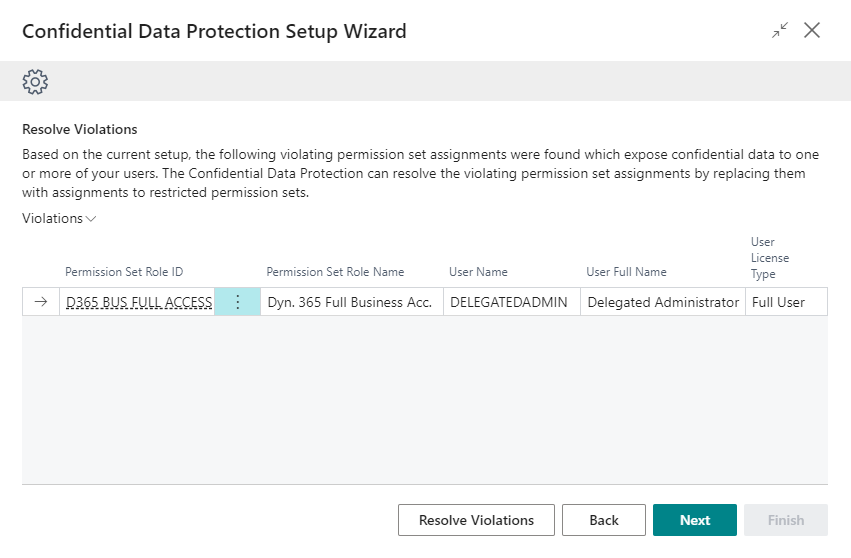
When you first open this step of the wizard the listpart page will show you the confidentiality-violating permission (set) assignments, i.e., assignments of a permission set that grants access to confidential table data to users.
Invoke the Resolve Violations actions to resolve the identified violations. After you invoke the action, you will first get a confirmation dialog which prompts you to confirm the action.
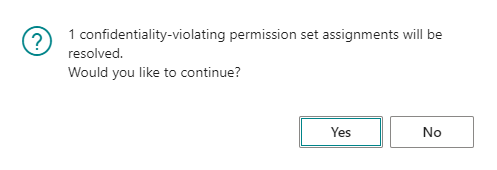
Choose Yes to allow the Confidential Data Protection extension to resolve the violations. During this action, each confidentiality-violating permission set assigned to users (or groups of users) will be replaced by a new, restricted permission set, derived from the original permission set, but without exposing confidential data.
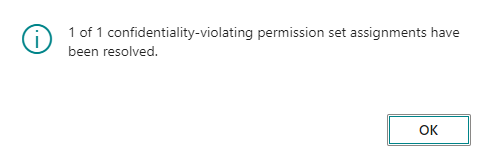
After the action has completed and the page is refreshed, all confidentiality-violating permission set assignments will have been resolved.
For more information, please also see the Identify and Resolve Violations section in the user manual.
Choose Next to move on to the next step of the wizard.
-
Restricted Permission Sets
The Confidential Data Protection extension automatically generates Restricted Permission Sets, which are permission sets in which the access that would be granted to confidential tables has been restricted, making them safe to assign to users without exposing confidential data.
The Restricted Permission Sets field displays the total number of restricted permission sets.
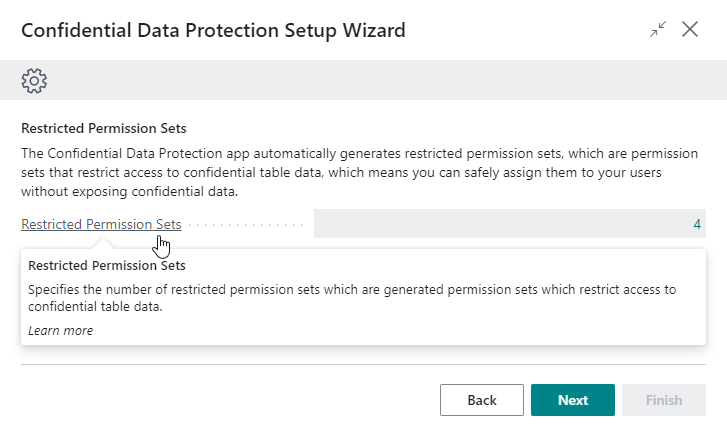
You can drilldown on this field which will open the Restricted Permission Sets page where you can view all restricted permission sets in your Business Central environment. On this page you can also view the Confidential (source) permission set that the Restricted permission set was derived from, if any, and how many times the permission set is used/assigned.
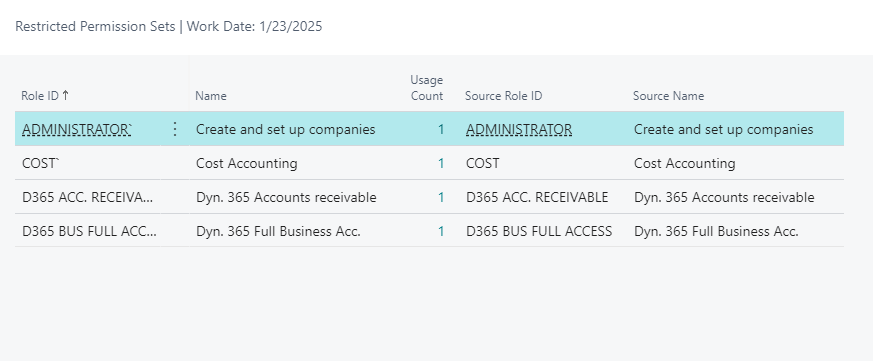
For more detailed information, please see the Restricted Permission Sets section in the user manual.
Choose Next to move on to the next step of the wizard.
-
Additional Properties on the Permission Sets Page
In the next step of the setup wizard page you will find some more setup options that you can use to configure additional preferences.
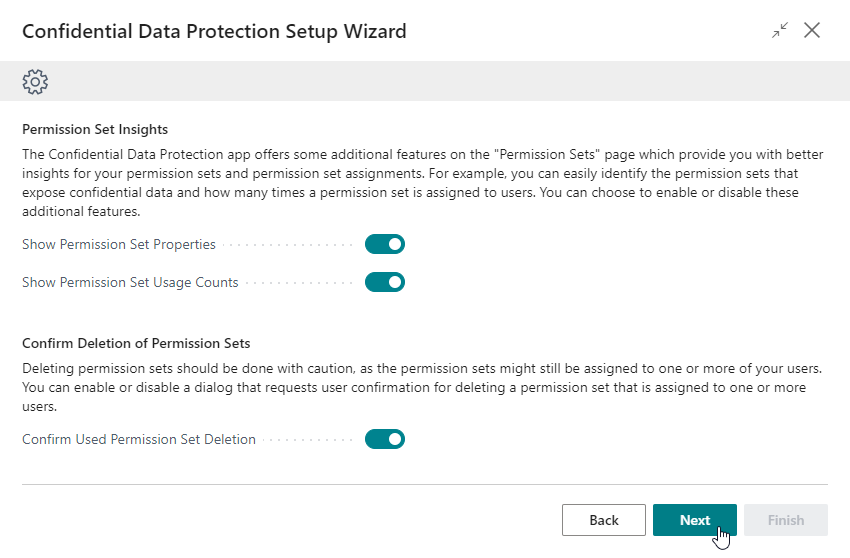
In the Permission Set Insights tab you will find feature toggles that can be used to enable/display or disable/hide additional properties on the Permission Sets page. These properties can provide you with additional insights into properties and usage/assignments of permission sets.
Show Permission Set Properties
The Show Permission Set Properties field can be used to specify whether the Permission Sets page should calculate and show additional fields which describe properties of the permission sets that are used by the Confidential Data Protection extension.

The fields that are added to the Permission Sets page when this setting is enabled, are as follows:
- Exposes Confidential Data - Specifies whether the permission set exposes confidential data when it would be assigned.
- Restricted - Specifies whether the permission set is a restricted permission set, i.e., a permission set for which the access that would be granted to confidential tables has been restricted, making them safe to assign to users without exposing confidential data.
- Protected - Specifies whether the permission set is protected against being edited/modified by a user.
Note that you can also sort and filter on these fields/properties.
Show Permission Set Usage Counts
The Show Permission Set Usage Counts field can be used to configure whether or not the Permission Sets page should calculate and show the Usage Count field which specifies the number of usages/assignments of each permission set. This provides you with better insights into whether permission sets are used or not.


Note that you can also sort and filter on the Usage Count field on the Permission Sets page.
For more information, please see the Permission Set Insights section of the user manual.
-
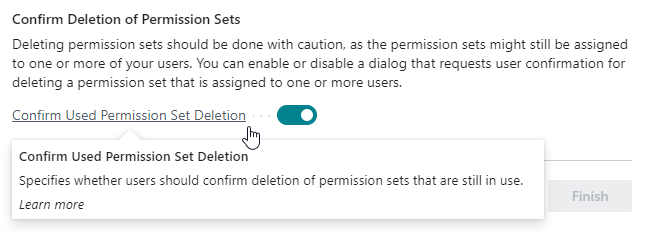
Confirm Deletion of Permission Sets
Deleting permission sets should be done with caution, as the permission sets might still be assigned to one or more of your users or groups of users.
In the Confirm Deletion of Permission Sets tab you can use the Confirm used Permission Set Deletion field to specify whether a confirmation dialog should be shown when a user attempts to delete a permission set. This prompts for user confirmation, making the user aware that the permission set that they are attempting to delete is still assigned to one or more users, or groups of users.
When you are done setting your preferences, choose Next to move on to the next and final step of the setup wizard page.
-
Click on Finish to finish the setup and start using Confidential Data Protection.
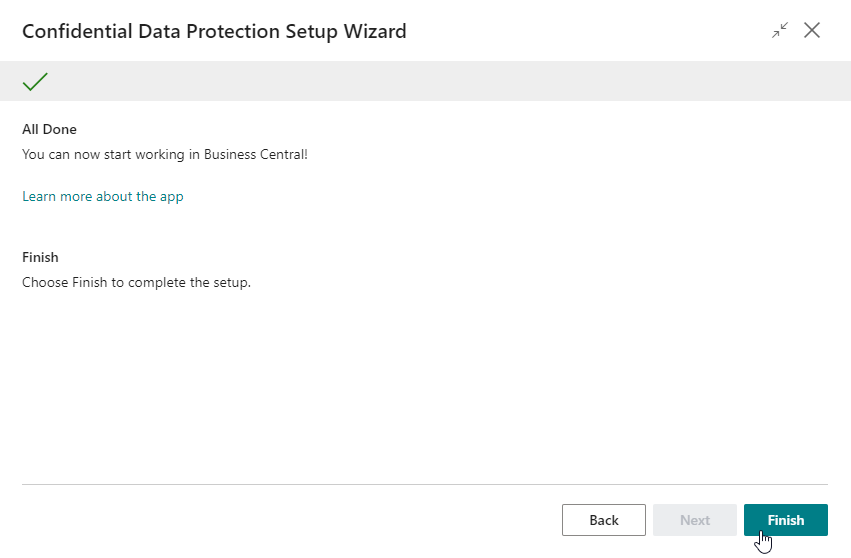
Please note that you can always open the Confidential Data Protection Setup page to edit the settings of the extension later if you would like to make any changes.
Alternatively, you can step through the Confidential Data Protection Setup Wizard page again to edit the settings.
Apportunix Confidential Data Protection is now configured and is ready to be used.